
Microsoft Clarity isn’t just for analysts—it’s a collaboration engine for your entire organization. From engineering and UX/UI to marketing, customer support, CRO, and experimentation teams, Clarity gives everyone access to real user behavior and shared visibility into what’s working (and what isn’t).
In this article, I’ll show you Microsoft Clarity’s collaborative features and how they facilitate the seamless sharing of insights across your organization’s cross-functional teams.
Whether you’re new to Microsoft Clarity, still learning the ropes, or looking to master the tool, this comprehensive, insight-packed tutorial will guide you through its capabilities.
Now, let’s go over each feature that makes Microsoft Clarity a powerful and efficient tool for collaboration within your cross-functional team.
Account Access Management
Why limit access to Microsoft Clarity when your cross-functional teams, such as CROs, marketers, analysts, and engineers, can also use its insights to take action? Onboarding the whole team onto Clarity enables them to independently find the qualitative answers they need.
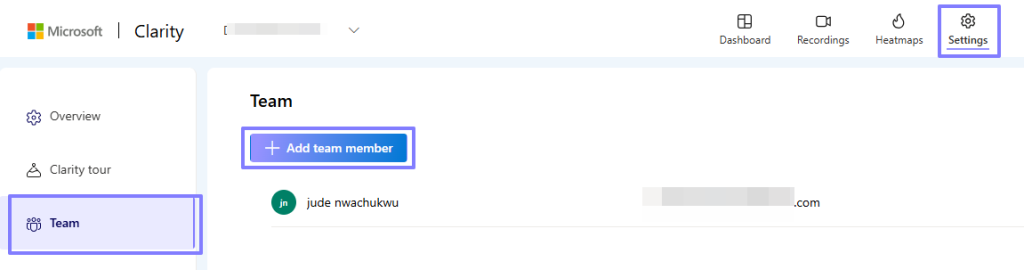
To invite team members, follow these steps:
- Navigate to the “Settings” interface.
- Click on the “Team” tab.
- In this view, click the “Add Team Member” button (with the plus icon) to invite new members.
Next, enter their email address and select their role, which is either Admin or Member.
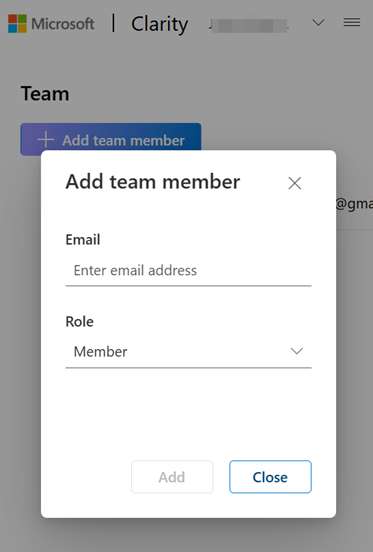
NOTE: Ensure the invited user’s email is associated with a Microsoft or Google account. Facebook accounts may also work.
There are two types of roles you can assign to your team members:
- Admin: Has full access to the project, including settings and team management. You can have multiple admins.
- Member: Can view and interact with data but has limited administrative privileges.
If needed, you can cancel an invitation before it is accepted.
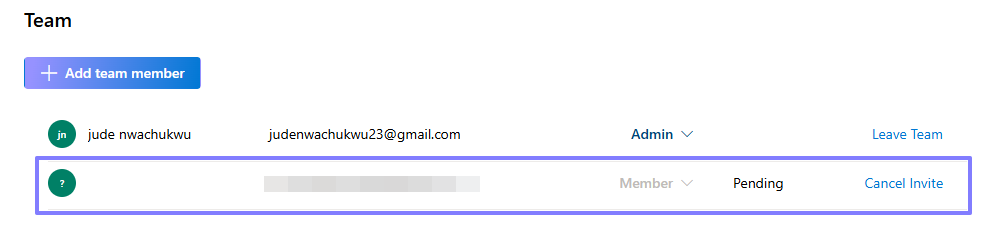
Once the invite gets sent, the recipient will receive an email, allowing them to accept the invitation and join the project.
Download and Export Capabilities
Your Microsoft Clarity project UI has “Download” and “Export” options across almost every interface and report.
I’ll briefly cover the various collaborative features available when downloading reports as PDF or PNG files.
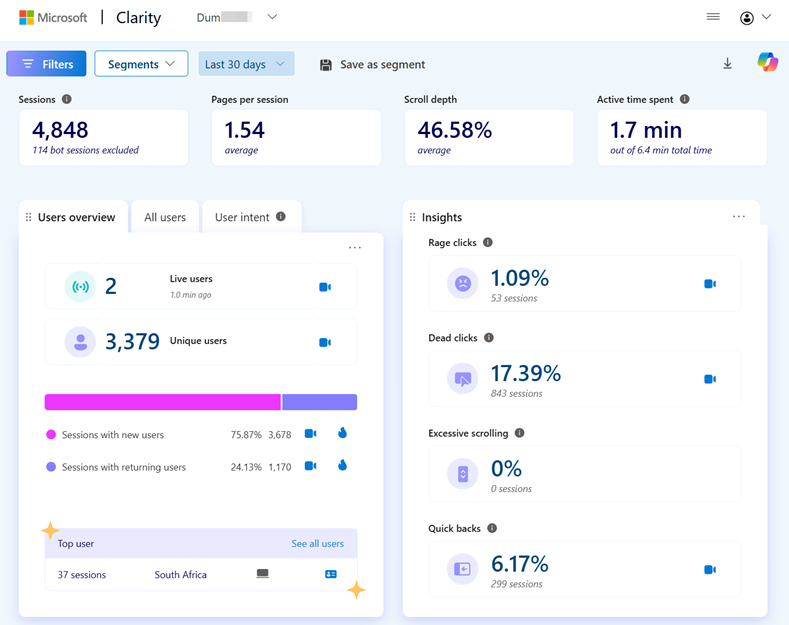
Downloading the Dashboard Report
If you need an image or PDF version of your Microsoft Clarity dashboard report, including with your data filters, Clarity allows you to download it as a PNG or PDF. Simply click the download icon on the left-hand side and select your preferred format. (Don’t worry; we’ll cover the CSV exports in the next section.)

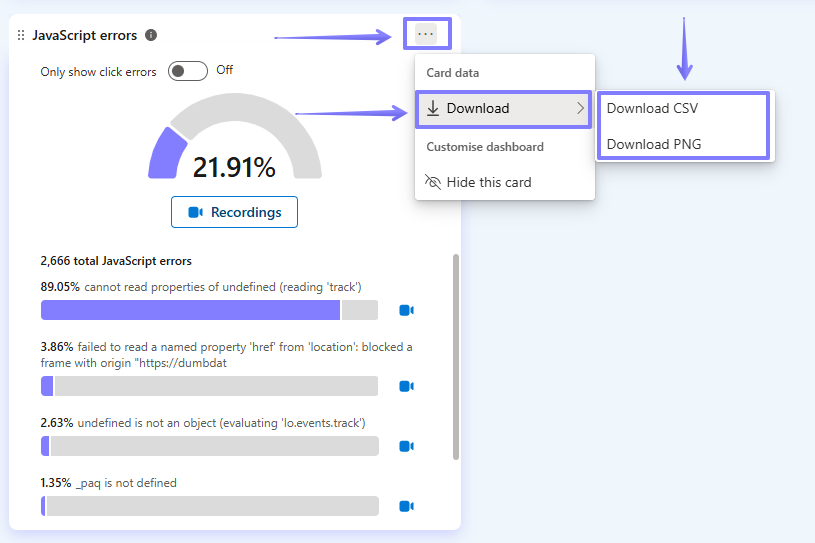
Downloading Specific Cards
Instead of downloading the entire dashboard, you can also download individual cards that provide specific insights.
To do this:
- Select the card you want to download.
- Click the download icon.
- Choose PNG as the format (PDF is not available for individual cards).
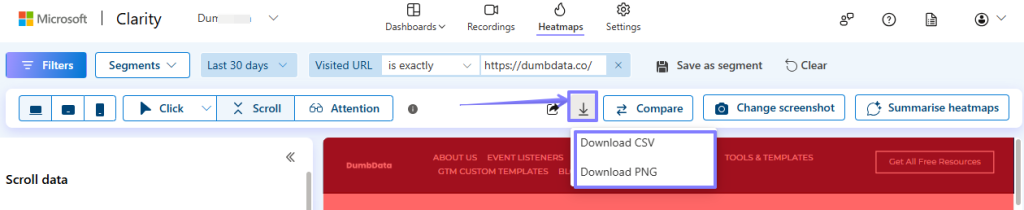
Downloading Heatmap Reports
Downloading heatmaps is particularly useful when you want to share heatmap data without granting direct access to Microsoft Clarity or using the built-in share option (which we’ll discuss later).
To download a heatmap report:
- Click the download icon at the top of the heatmap interface.
- Select PNG as the export format.
There are a few things you should keep in mind when trying to download heatmaps in Microsoft Clarity:
- The download option is available for all types of heatmap reports.
- PDF format is not supported for heatmap downloads.
- If a modal popup or consent popup is obstructing the heatmap screenshot, click “Change Screenshot” to reload it and ensure the popup does not trigger again.

CSV Data Exporting
Microsoft Clarity also supports CSV exports, allowing you to share data with relevant teams for further analysis and decision-making.
Let’s quickly go over the different CSV export options that are available.
Exporting Errors to CSV
To export JavaScript Errors or Click Errors as a CSV file:
- Navigate to the “JavaScript Errors” card in the dashboard.
- Click the download icon.
- Save the CSV file and share it with your engineering team.
Remember that the export does not include the exact page where the error occurred. There are more precise ways to share identified errors within Microsoft Clarity.
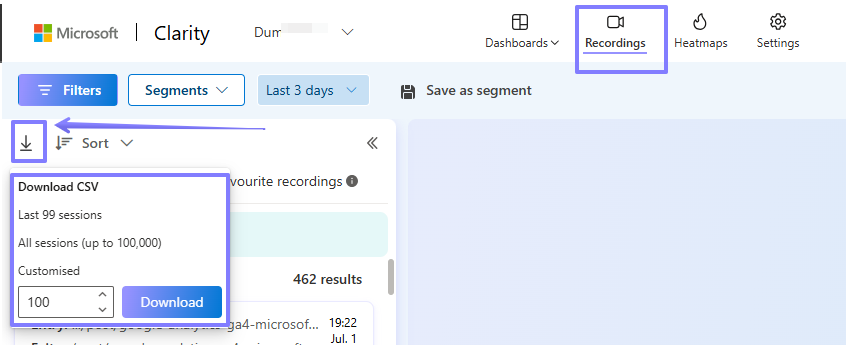
Exporting the Session Recordings List to CSV
In addition to exporting reports, you can export session replays as a CSV file, which includes session URLs and other relevant details.
This Clarity feature also supports bulk exporting of session replay URLs, making it easier to analyze user behaviour. It’s also possible to export a recordings list after applying a data filter or segment (another collaborative feature we’ll cover later).
- Click the download icon.
- Enter the number of sessions you want to export.
- Click Download, and the CSV file will be saved to your device.
Exporting Heatmap Data to CSV
You can also export heatmap data as a CSV file to better understand the ranking and percentage distribution of elements on a webpage.
Here’s how to export heatmap data:
- Click the download icon in the heatmap report.
- Select CSV as the export format.
Exporting Dashboard Data to CSV
Certain dashboard cards can also be exported in CSV format.
Here is how you can export dashboard data:
- Scroll to the specific dashboard card.
- Click the download icon.
- Select CSV as the export format.
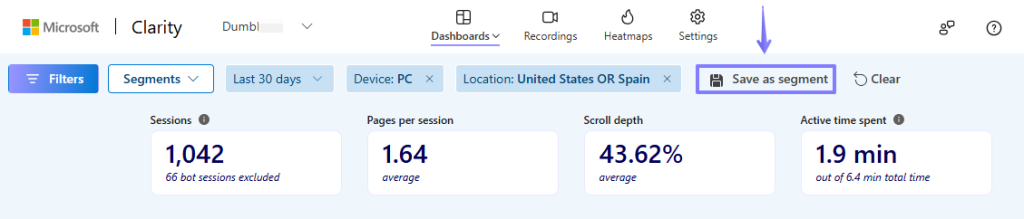
Data Segmentation
Segments can be a significant time-saver, eliminating the need to manually configure data filters each time you need them.
Instead, you can save groups of filters as a segment, which other users can access within the same Microsoft Clarity project:
- Apply your data filters (the prerequisite step needed) as needed.
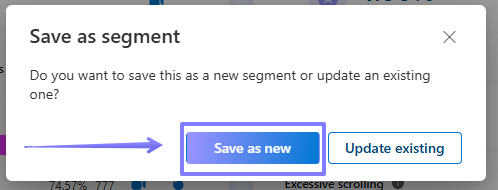
- Click on “Save as a segment.”
- In the modal popup, click “Save as new.”
- Assign a name to your segment.
- Click “Save.”
Once created, you can apply the segment by clicking the “Segment” dropdown and selecting your preferred segment.
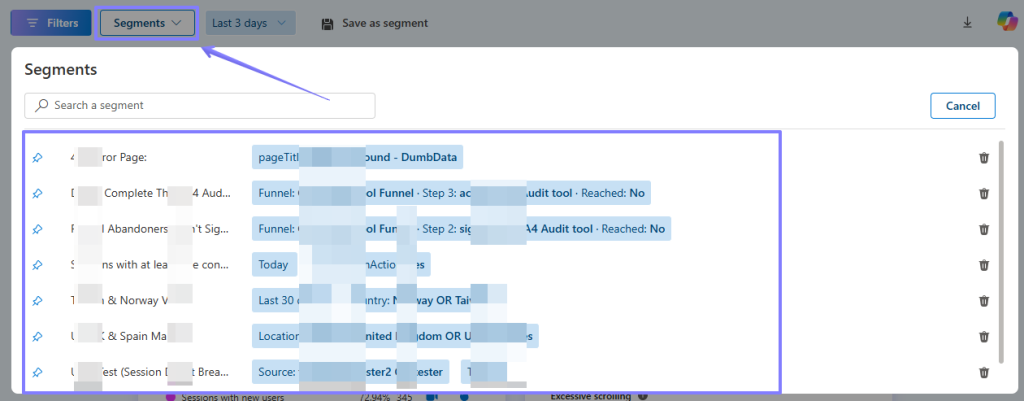
You also have the option to pin a segment, ensuring it is automatically applied every time you access your Microsoft Clarity project. You can do this by clicking the pin icon next to your segment.
One helpful tool you can use to get the most out of your data segmentation is the “My Watchlist” feature.
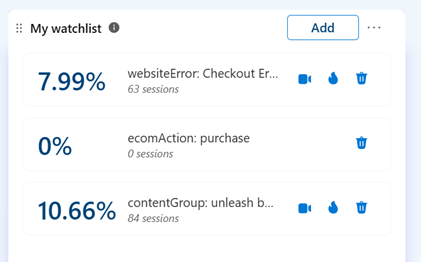
The “My Watchlist” feature allows you to easily add and monitor changes in specific segments, custom tags, or labels that trigger you to take particular actions.
Unlike shared segments, your watchlist is private to you and is not visible to other team members.
Custom Labels
Custom Labels is a powerful feature in Microsoft Clarity that enhances collaboration across cross-functional teams.
In addition to improving teamwork, Custom Labels allow you to extend session recording retention beyond the standard 30-day limit, preserving selected recordings for up to 13 months.
What Are Labels in Microsoft Clarity?
Labels enable users to tag session recordings, categorizing them based on user behaviours and session characteristics. This helps teams quickly identify, organize, and revisit key recordings.
When applying labels, you can either:
- Select from existing label types.
- Create a custom label.
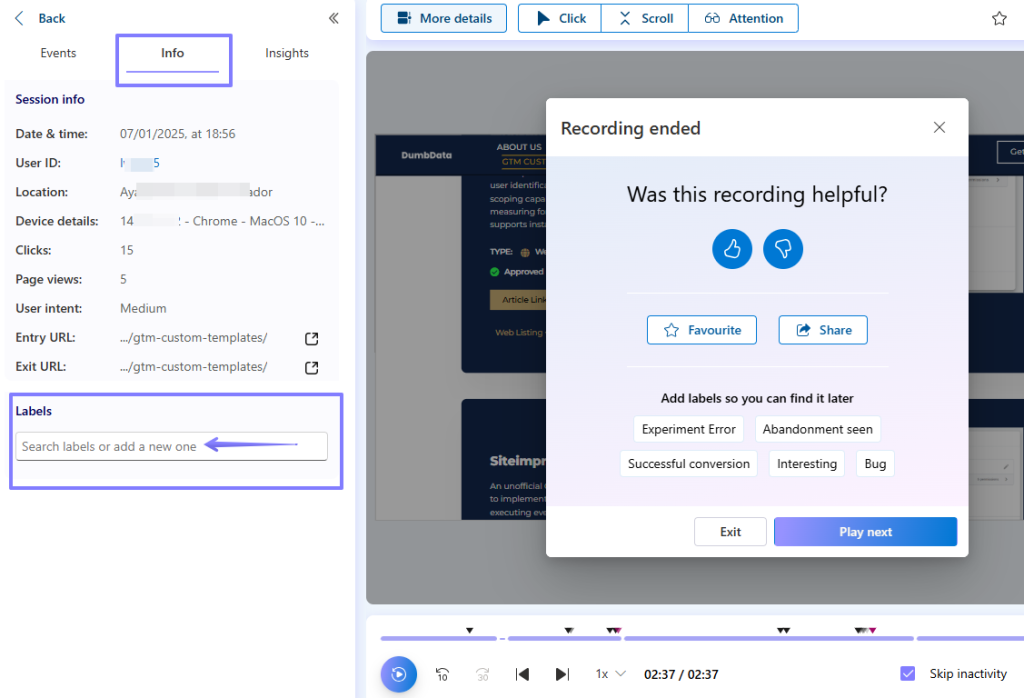
You can add labels while viewing a session playback in one of two ways:
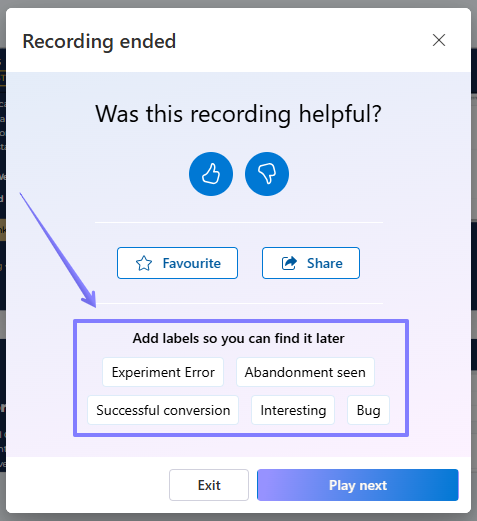
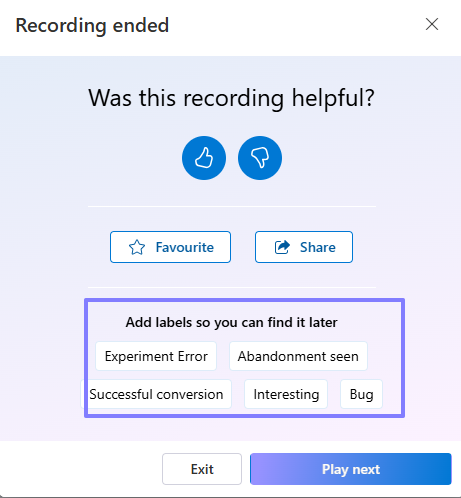
- At the end of a session, when a modal popup appears.
- During playback, via the “More Details” view, in the “Info” tabs.
Labels help with organizing and tracking recordings, making it easier for you and your team to reference them later.
By default, Microsoft Clarity provides four built-in labels:
- Bug
- Interesting
- Successful Conversion
- Abandonment Seen
However, you can also create custom labels to better suit your needs. Let’s explore how to apply and create labels in Clarity, as well as how to filter recordings by labels.
To apply a custom label to a recording:
- Navigate to a session recording.
- At the end of the playback, you can select from the four default labels.
- To add a custom label, open the “More Details” view.
- Click on the labels field (if no labels are applied, it will display “0 labels”).

When you click inside the field, you can either:
- Select from the default labels.
- Type a new label, then click the “Add Label” option to create a custom one.
When using labels in your Microsoft Clarity project, there are a few details and constraints to keep in mind:
- Each project can have up to 1,000 labels.
- Labels cannot be edited once created.
- You can add up to 5 labels per recording.
- There is no limit when filtering sessions by labels.
- Labels cannot be deleted. To remove a label from your project, you must manually remove it from each associated recording.
- Each label can contain a maximum of 50 characters.
- Labels remain in Clarity for up to 90 days.
How Labels Support Collaboration and Cross-functional Teams
Once labels are applied, team members can reference similar sessions by filtering recordings with a specific label.
For example:
- Engineers can filter for “Bug” sessions to analyze issues and debug more efficiently.
- Marketing teams can review “Successful Conversion” sessions to understand customer behaviour.
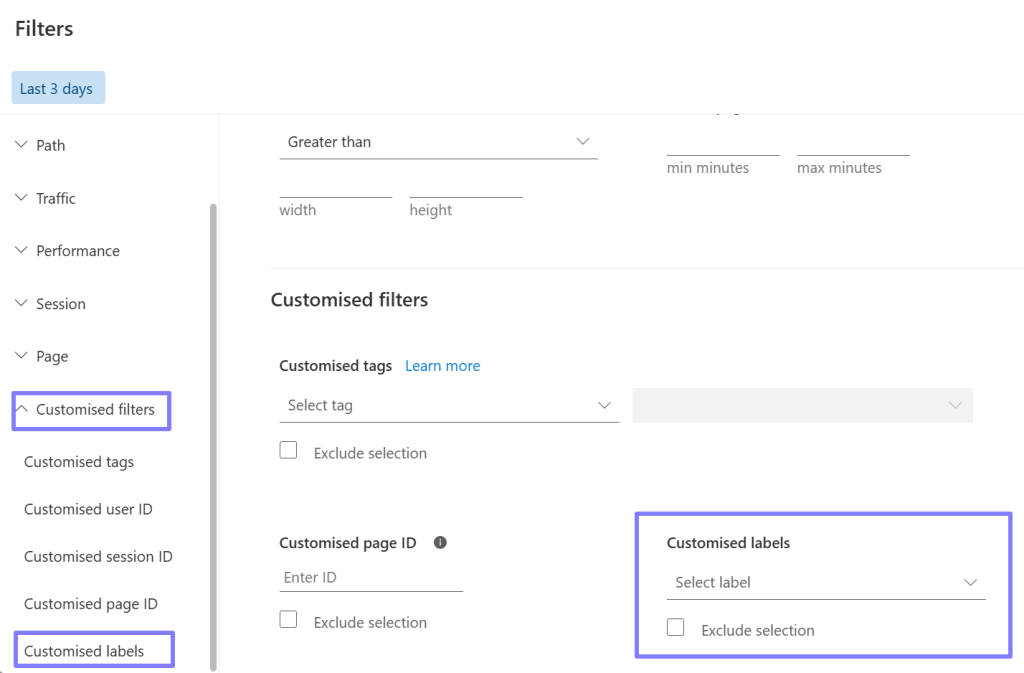
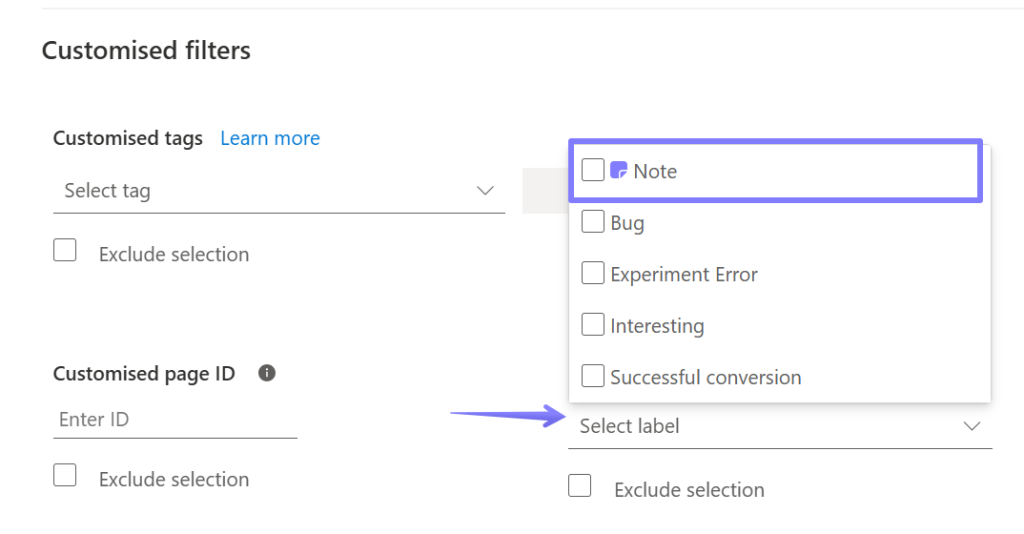
To filter session recordings by labels;
- Navigate to the Filters section.
- Select “Custom Labels” from the available filters.
- Choose the label by which you want to filter.
Notes
Notes is a feature in Microsoft Clarity designed to improve collaboration within your team by allowing you to add contextual information directly to session recordings in your Clarity project.
Instead of jotting down insights, bug reports, or additional context in external documents where other team members with access to the Clarity project might not see them, you can use the Notes feature to keep everything centralized and visible to all collaborators.
With Notes, you can:
- Share insights directly in the session timeline.
- Highlight issues with additional commentary.
- Ensure team members across functions stay aligned.
Here is a practical use case of how to use this feature.
Imagine you’re a marketer reviewing a session replay of a landing page receiving traffic from a paid ad campaign. During the review, you notice a bug affecting the user experience.
Here’s how Notes can help:
- You can label the session with an appropriate identifier, like “bug” or “critical issue.”
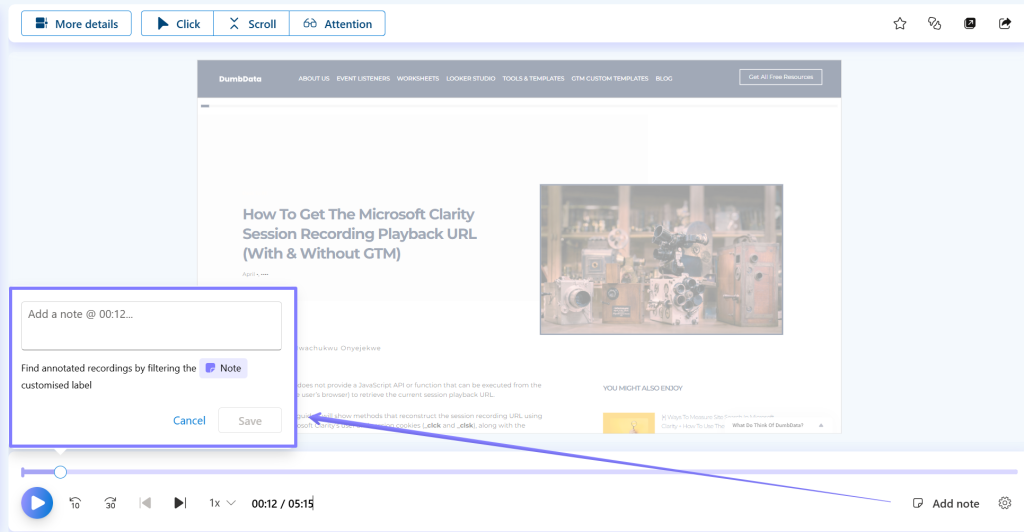
- Add a Note with context, such as what happened, when it occurred (timestamp), and its impact.
- Share the session recording with your developer or engineer for quicker troubleshooting.
This cross-functional feature ensures that critical information doesn’t get lost in translation and stays tied to the exact moment in the user journey where the issue occurred.
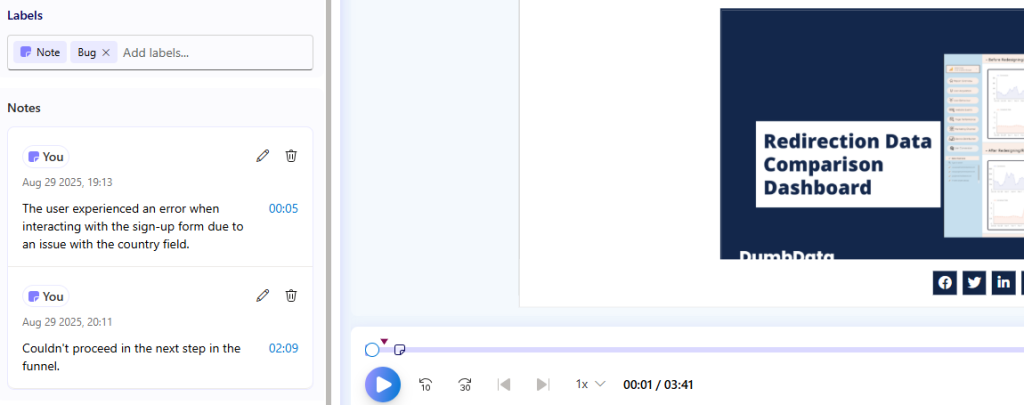
A Notes icon appears on any session replay that has at least one note.
You can see who added the note, helping track contributions across the team.
Use filters to find session recordings that contain notes quickly.
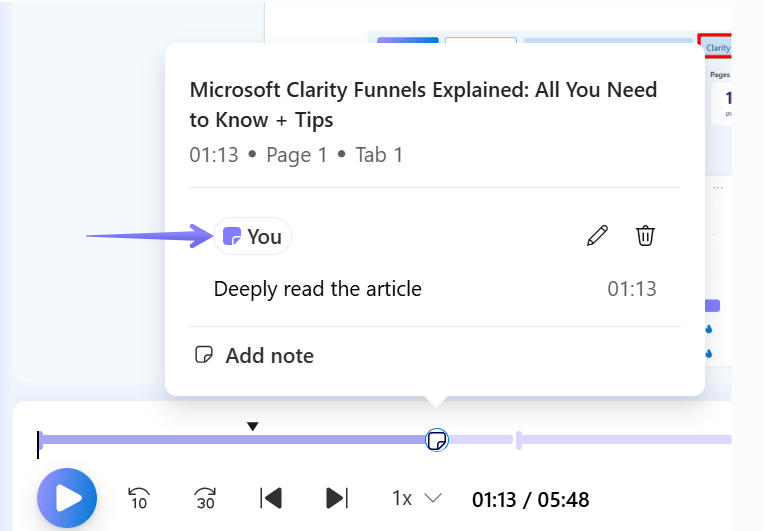
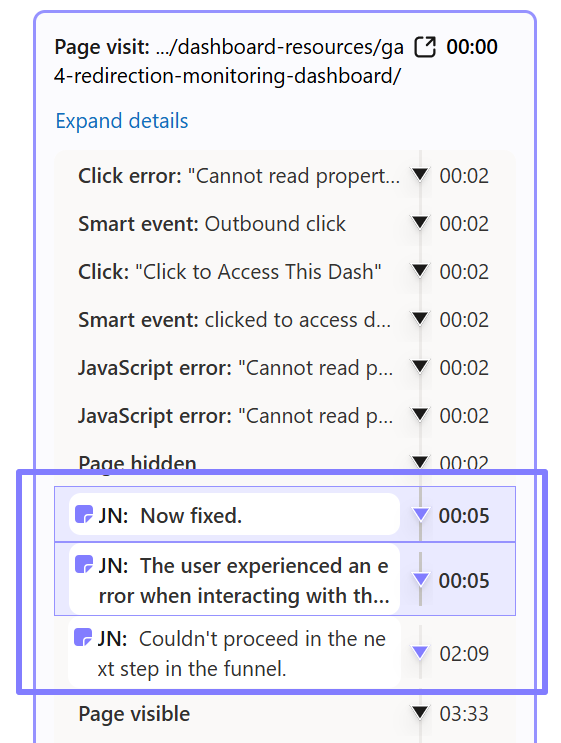
Notes appear directly on the session timeline, and clicking on them takes you to the exact moment in the recording. You can also use Notes to provide follow-up context, such as confirming when an issue has been fixed.
By integrating Notes into your team’s workflow, Microsoft Clarity becomes an even more powerful tool, enabling clear communication, faster troubleshooting, and more value across your entire team.
Favoriting Session Recordings
Microsoft Clarity allows you to favorite session replays that you find interesting or want to keep for future analysis or sharing with your team.
This feature serves two key purposes:
- Quickly reference important session recordings for easy access to your team members.
- Extend session retention; while Clarity retains session replays for 30 days, favorited recordings are stored for up to 13 months.
There are multiple ways to favorite a session replay:
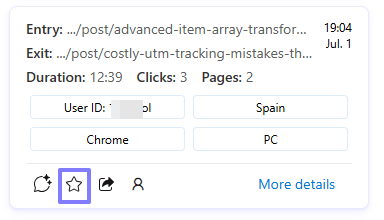
Option 1: From the session recording list, click the star icon next to the session you want to save.
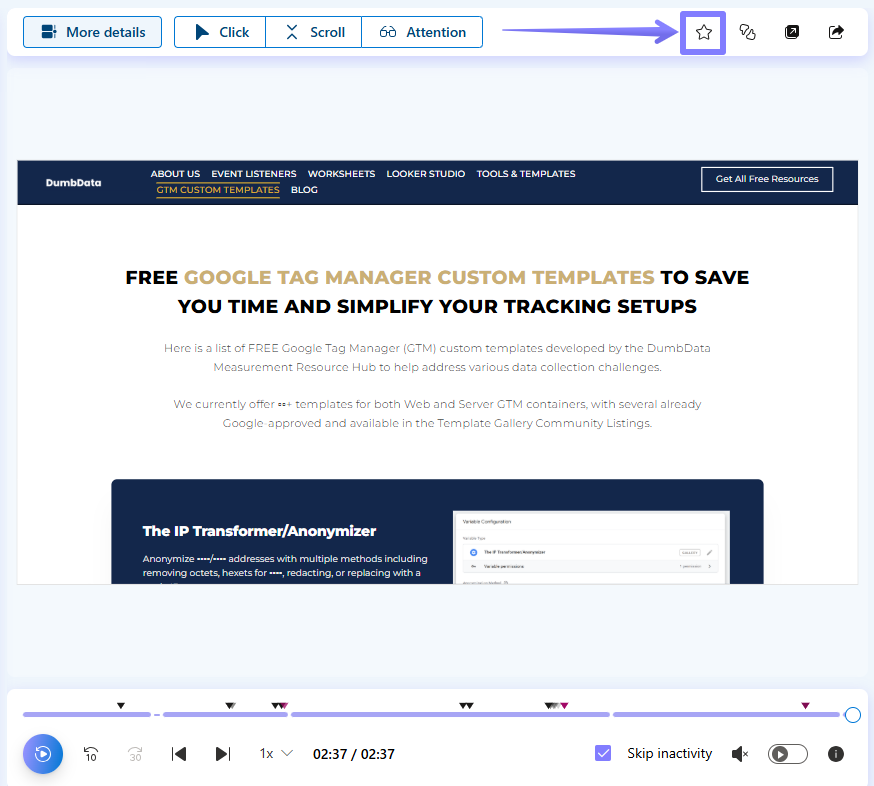
Option 2: While watching a session replay, click the star icon at the top of the playback window.
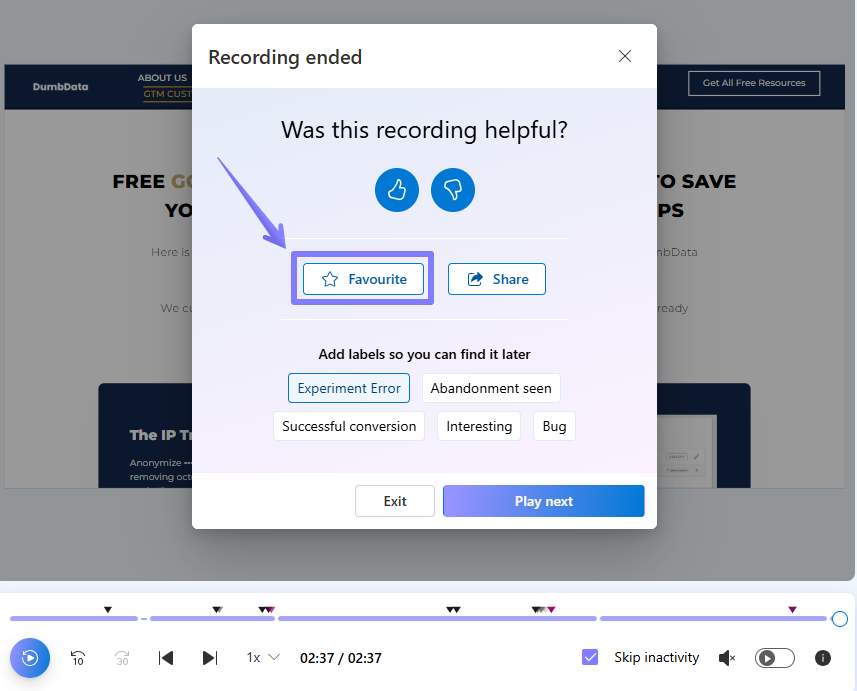
Option 3: At the end of a session replay, use the popup option displayed at the end of the recording to mark it as a favorite.
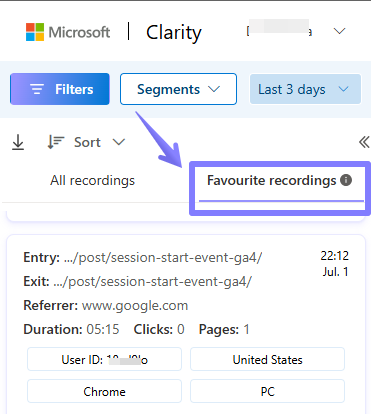
Once a session is favorited, you and your team can access your saved replays under the “Favorite Recordings” tab.
Also, keep in mind that Clarity automatically removes favorited sessions after one year. If you can’t find a session you favorited within the last 13 months, check if you have filters or segments applied, and clear them to see all saved sessions.
There is no limit on the number of sessions you can favorite within a project.
Custom Tags
Custom Tags are customizable filters that allow you to analyze session recordings and heatmaps in a more targeted way. They help you:
- Categorize and track user behavior at the page level.
- Pass additional data for deeper insights.
- Share insights across your team for collaborative analysis.
Once you start applying Custom Tags in Clarity, you can use them to:
- Filter session recordings and heatmaps for focused analysis.
- Create data segments from these filters.
- Add them to the “My Watchlist” card for easier monitoring and tracking.
If you’re new to this feature and want to learn more, I’ve written a few guides to help you get started:
- A guide to understanding Custom Tags in Clarity
- An article showcasing innovative ways to use Custom Tags
Or read Microsoft Clarity’s documentation on this feature.
Sharing Recordings & Heatmaps
In addition to exporting and downloading data, Microsoft Clarity allows you to share session replays and heatmap reports with colleagues within and outside your department.
You can share this data whether or not the recipient has access to your Clarity project.
Sharing Session Recordings
Clarity lets you share session recordings with anyone, whether or not they have access to your Clarity project. This makes it easy to pass insights along to cross-functional team members.
There are multiple ways to do this:
- At the end of the session replay, click the share button displayed on the screen.
- From the playback view, click the share icon at the top of the session recording.
- From the session list, click the share icon on the session recording card.
When you click the share button, a sharing menu appears, allowing you to:
- Share via link: You can generate a shareable link for anyone to view.
- Share via email: Send the recording directly to a recipient’s inbox.
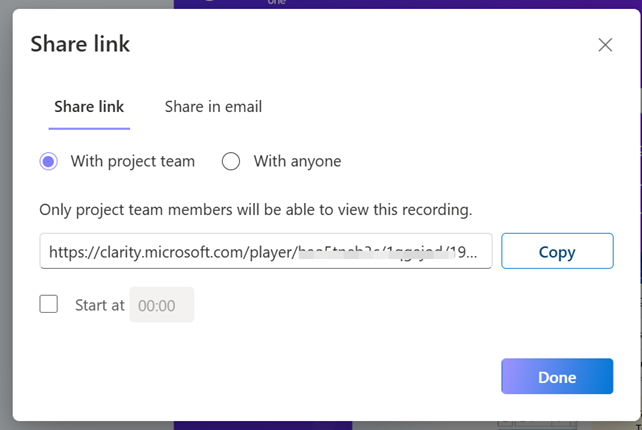
If you want the recipient to start the replay from a specific moment, you can set a custom start time before sharing the link. (This feature is only available for link sharing.)
Sharing Heatmap Reports in Microsoft Clarity
Clarity also supports the ability to share heatmap reports. This allows you to send heatmap data for a specific webpage with teammates, even if they don’t have direct access to your Clarity dashboard.
- Share via link: Generate a public or internal link.
- Share via email: Send heatmap data directly to a recipient.
Copilot-Generated Insights
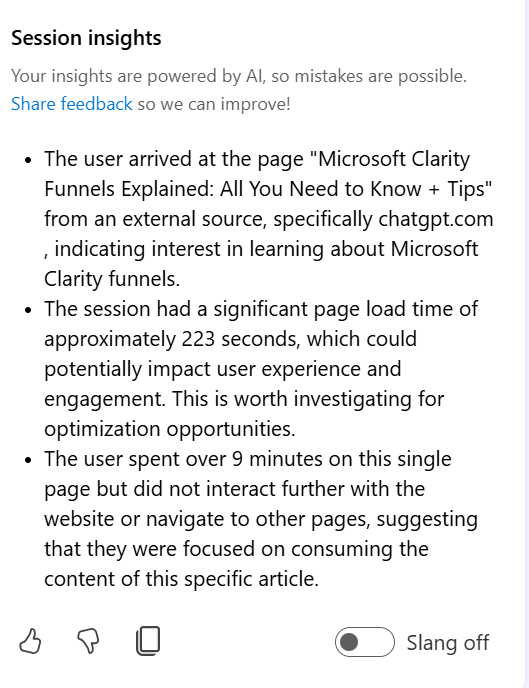
Copilot, Microsoft’s AI assistant, is built into Clarity to automatically generate summaries and insights from session replays and heatmaps, helping teams quickly unlock key findings.
I’ve written an in-depth article about this feature, which you can read to learn more about Microsoft Copilot and its AI capabilities.
How Copilot Helps Cross-Functional Teams
At first glance, you might not see how this feature benefits cross-functional teams, but here’s a practical example:
Imagine you and your team have been tasked with reviewing a list of session recordings where users failed to complete a key action in the funnel.
Your team can use Clarity’s Copilot AI to quickly generate summaries and key takeaways, helping streamline the analysis.
If you share a session recording URL with someone who doesn’t have access to the Clarity project—and therefore can’t see the AI-generated summaries—you can generate the insights for them and use the copy icon to share the summary along with a link to the recording.
The same approach can also be applied to heatmaps, allowing you to share AI-driven insights for visual data analysis.
Another way Copilot enhances team collaboration is with the Clarity MCP Server. This feature functions like a Clarity Copilot chat, but operates outside the Clarity UI.
The MCP Server can be seamlessly integrated into the systems your team already uses, enabling AI agents to retrieve data from your Clarity project without the need for manual logins. These AI agents can access the Microsoft Clarity MCP Server directly, streamlining the data usability process.
Third-Party Integrations
One of the biggest mistakes in MarTech is using tools in isolation.
Product integrations are a powerful way to connect Clarity with the tools used by your team and other departments. These integrations help bridge the gap between qualitative insights from Clarity and the analytics, marketing, or customer experience tools leveraged by your cross-functional team, enhancing collaboration and decision-making.
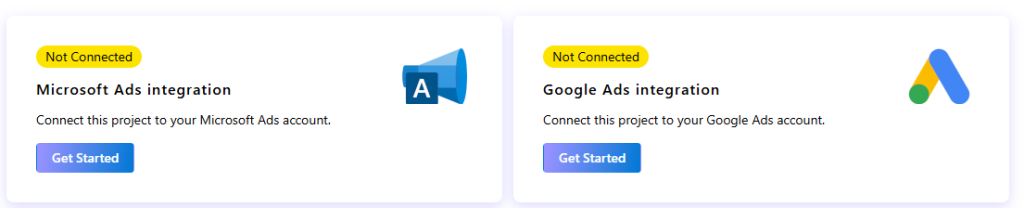
Paid Media Integration
By integrating Microsoft Clarity with paid advertising platforms such as Google Ads and Microsoft Advertising, you and your paid media team can leverage the valuable data Clarity collects to enhance the user experience post-click. This insight will help optimize your campaigns, ultimately driving better results.
The integration process is intuitive and straightforward, with detailed instructions available in the settings tab.
Web Analytics Integrations
Microsoft Clarity can be integrated with popular web analytics tools, including:
- Google Analytics (GA4)
- Piwik Pro
- Adobe
- Mixpanel
Experimentation & CRO Integrations
For A/B testing and conversion rate optimization (CRO), Clarity supports native integrations with:
- Kameleoon
- AB Tasty
- Optimizely
For tools without native support, you can still integrate Clarity using custom tags, Zapier (more on that soon), or other customizable Clarity data points.
CRM & Sales Enablement
Microsoft Clarity can also be integrated with native CRM platforms like HubSpot. Additionally, there is an option to manually connect your CRM with your Microsoft Clarity project by leveraging key data points such as:
- Session ID
- User ID
- Microsoft Clarity playback URL
Integrating Clarity with your CRM can help by::
- Providing sales teams with access to behavioral insights and qualitative data.
- Giving marketing teams deeper insights by linking sales data with behavioral analytics.
Error Monitoring & Developer Tools
The internal tools your development team uses to monitor website errors and user experience issues can be integrated with Microsoft Clarity.
By connecting these tools, you can provide your engineering team with session recording playback URLs, allowing them to review user sessions and gain deeper insights into potential issues.
Zapier Integration
Clarity’s Zapier integration unlocks endless automation opportunities, including:
- Real-time monitoring
- Automated notifications & alerts
- Connection with hundreds of apps in the Zapier ecosystem
One of this integration’s most powerful features is the ability to set thresholds for specific metrics. For instance, if you’ve identified that a 20% rage click rate is concerning, you can set this as a threshold in Zapier. Clarity will then send updates to Zapier every 6 hours, notifying if this threshold has been exceeded. This proactive approach ensures that you’re always in the loop, allowing for timely interventions.
Closing Remarks
Whew, that was a lot to cover! Now that you’ve seen how Microsoft Clarity supports cross-functional teams, I’d love to hear your thoughts.